Over 40 years ago, my mom and dad decided to put their little nest egg into a Frame Shop. At the time, there were no Michael’s or Hobby Lobby’s…you couldn’t go to WayFair.com or Amazon.com for your home décor needs. In fact, they were on the cutting edge of a relatively new industry- the local frame shop.
To this day, the shop they started is the oldest business in our town. Throughout their career, they helped countless customers and counseled thousands of clients on where and how to hang artwork.
Here are a few of their best tips and practices for hanging wall art.

Step 1: Choose Your Art Wok
The first step in hanging artwork is to consider the subject. What do you want to hang…is it a diploma, an abstract piece of art, a family portrait, etc?
The subject of the artwork will influence the room you select for hanging the picture.
There are not any hard and fast rules when it comes to the type of pictures you hang in each room. However, there are some general conventions that are accepted. For example, it would be strange to see a diploma hanging in a bathroom or in the living room. With that said, it’s 100% up to you.
Take a step back and think about how you want the room to feel- is it playful, inspiring, studious, etc. Then make sure the artwork represents the feeling you want to create.
Step 2: Decide on the Location for Hanging Your Picture
Before you decide on the location, you’ll need to consider the number of pieces and the size of the frame you want to hang.
How many pieces are you hanging together? Is it a stand-alone piece of art, multiple pieces you want to make a grouping out of, or a diptych or triptych, 2 – 3 pieces of art that are meant to hang side by side?
What is the size of the artwork?
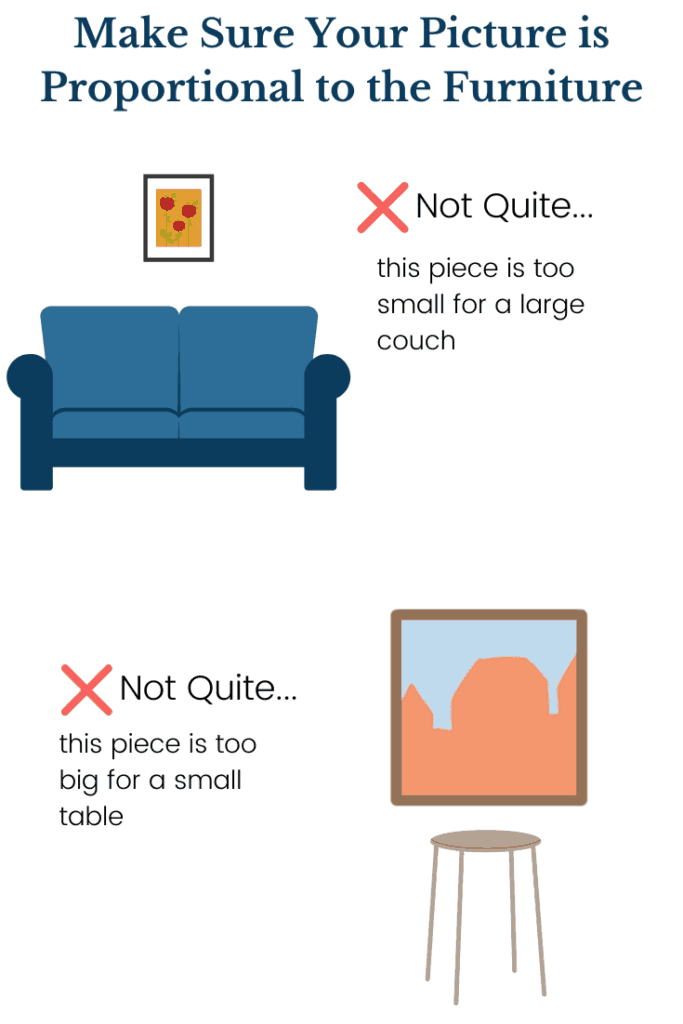
Is it small medium or large, tall and wide or short and wide, etc.? You want a wall that has enough space, and not too much space at the same time. For example, a small single piece of art would not look good over a long couch. On the other hand, a large picture or grouping of pictures would not look right over a small piece of furniture.
Note: when you’re hanging a grouping of pictures, you consider the space the entire grouping will encompass.
Step 3: Choosing a wall
When choosing a wall for hanging your picture, it’s customary to use the wall you see first when you walk in a room. So, if you’re hanging a picture in a bedroom, it would likely be over the bed or over a dresser.
Sometimes it’s not possible to use the most visible wall. A second choice many people make is to use a wall that has furniture against it e.g. a couch or a table.
It’s also good to consider the color of the wall and the color of the exterior mat if your picture has mats. If you have a blue wall and a blue matt, the picture will not pop and will blend into its surroundings.
Step 4: Gather your Tools
Now that you’ve selected your artwork, the room, and wall for it to hang, it’s time to gather your tools. You’ll need the following:
- Pencil
- Measuring tape or yardstick
- Level
- Drill or hammer
- Nails with hooks, screw, or anchor
- Stud finder (optional)
You’ll use a hammer if you’re nailing directly into a stud. A screw is helpful if it’s a particularly heavy picture and you’re going into a stud. An anchor and screw are used when you’re hanging directly into drywall (no stud) and the piece is heavy.
Step 5: Marking Where to Nail
There are two types of people…those who measure before they hang and those who don’t! If I’m in a hurry, my dad’s not around, or I just can’t be bothered, then I fall in the second category. I DO NOT recommend this approach. It usually leads to multiple holes in the wall along with rework. And who has time for that?
So, when my parents hang pictures (the right way) – they measure before they hammer in a nail.
Measure the height and width of your picture. Write these measurements down so you don’t forget.
Horizontal Spacing
If hanging a single picture, then center it above the furniture or on the wall. Measure the width of the wall or furniture and divide by two. This is the measurement you need for the center of the picture.
Wall or Furniture measurement / 2 = center mark for hanging
PENCIL MARK #1 – Now, make a small vertical line with your pencil on the wall.
Vertical Spacing
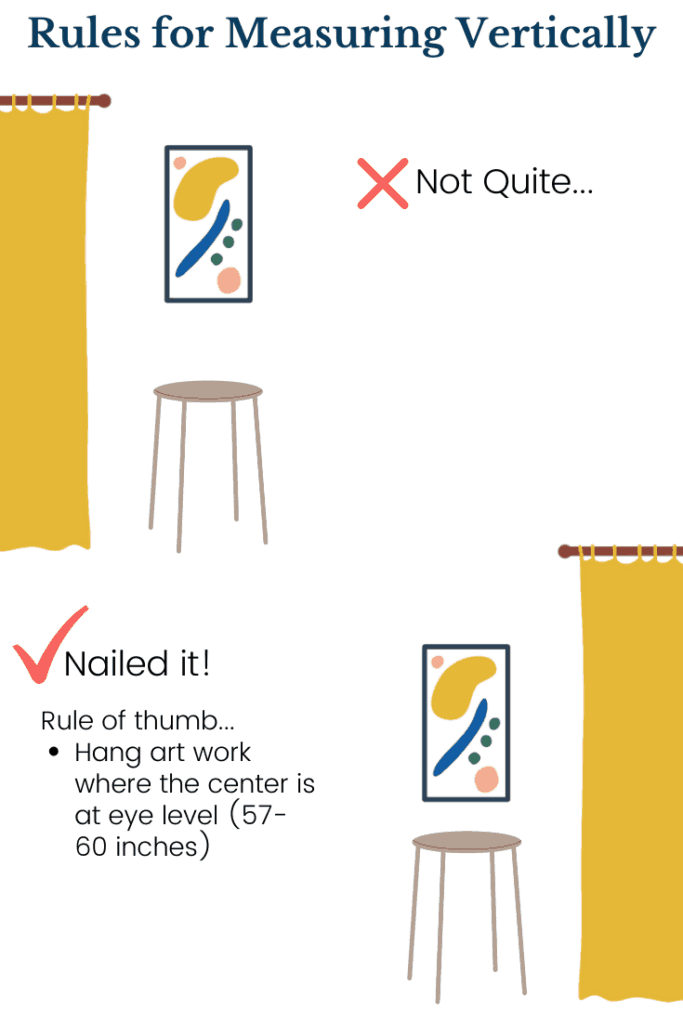
If you are hanging a picture on a wall with no furniture, then the general rule of thumb is to hang the middle of the picture at eye level between 57 – 60 inches. Alternatively, if you’re hanging above furniture like a table or a buffet, you could hang it 6-8 inches above the top of the furniture.
Eyelevel example:
Let’s say you want to hang a 30-inch-tall picture. The center of the picture is 15 inches from the top or bottom of the frame. You’re using 57 inches for eye-level. Then you would want the top of the picture to be 72 inches (57 + 15 inches) above the floor.
PENCIL MARK #2 – EXAMPLE A: Draw a horizontal line at 72 inches.
Above furniture example:
Let’s say you want to hang a 30-inch-tall picture. If you’re hanging artwork above a couch, then you would go 6-8 inches above the couch. We’ll use 8 inches for this example, add 30 inches for the height of the picture, and
PENCIL MARK #2 – EXAMPLE B: draw a horizontal line at 38 inches above the couch.
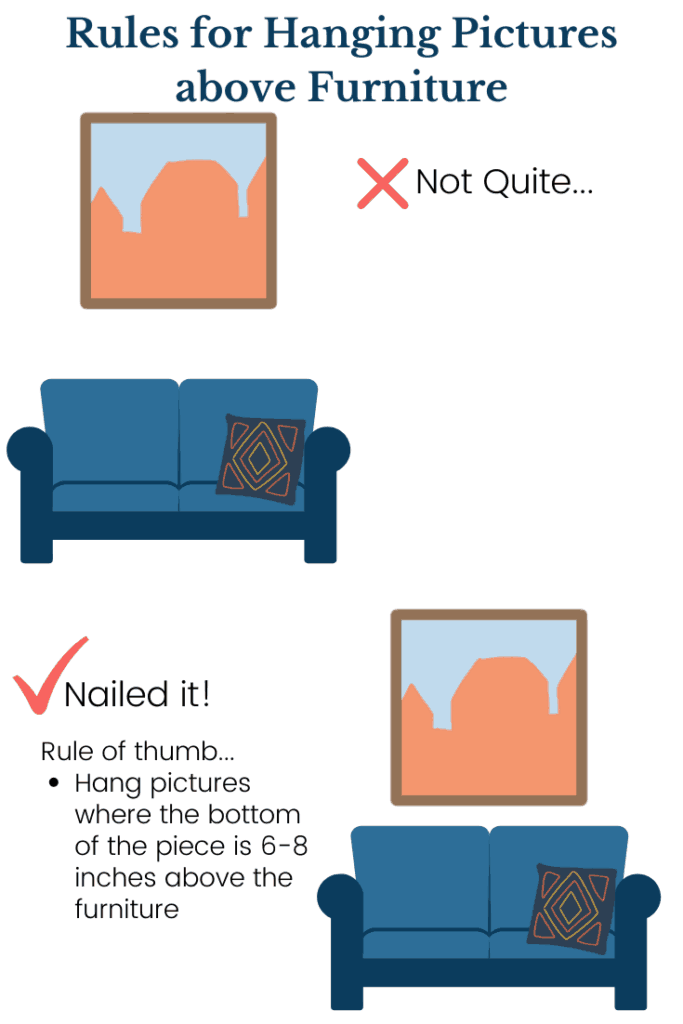
There are times when hanging a picture may not follow either of these two rules. For example, if you’re hanging artwork over a headboard or a mantle. You may need to go higher than eye-level. If it’s a small amount of vertical space, then you can center the artwork vertically leaving the same amount of space between the top and the bottom. Otherwise, stick with the 6-8 inches practice.
Step 6: Picture Hanging Hardware
There are several ways you can hang pictures. Frames will either have saw-tooth hook(s) at the top, loop hooks on the side, or a wire going horizontally across the back.
Note, it is helpful to have two people at this point in the hanging process.
Hanging with a Saw Tooth Hanger
When hanging with a saw tooth hanger, you don’t need to make any adjustments from the two marks you made in step 4. You are good to go ahead and hammer in your nail(s) in the center of your vertical and horizontal marks.
Hanging with Loop Hooks
Loop hooks are a little more complicated. Loop hooks are small semi-circles on the left and the right sides of the frame. With this type of format, you’ll need to account for how far down the hooks are from the top of the frame. Measure the distance of the top of the loops from the top of the frame.
Let’s say the top of your loop is 7 inches from the top of the frame. We’ll use the same “eyelevel example”: we used above,
Eyelevel example: Let’s say you want to hang a 30-inch-tall picture. The center of the picture is at 15 inches. You’re using 57 inches for eye-level. Then you would want the top of the picture to be 72 inches (57 + 15 inches) above the floor.
So, we want the top of the picture at 72 inches, but now we need to account for the placement of the hooks (7 inces from the top)
72 Inches – 7 inches = 65 inches
Your nail should go at 65 inches from the ground. You’ll need one on the left and one on the right, ensuring the center of the picture is aligned with your horizontal mark.
Hanging with a Wire
When hanging with a wire, measure the distance from the top of the frame to the wire. Do this by pulling the wire tight in the middle then measure from the top of the wire to the top of the frame.
You should now have a vertical and horizontal hash mark to guide where you place your nail(s).
Hanging Groupings of Pictures
Hanging groupings is definitely more complicated. First, lay the grouping on the floor and play with it. Group it several different ways to find the arrangement you like.
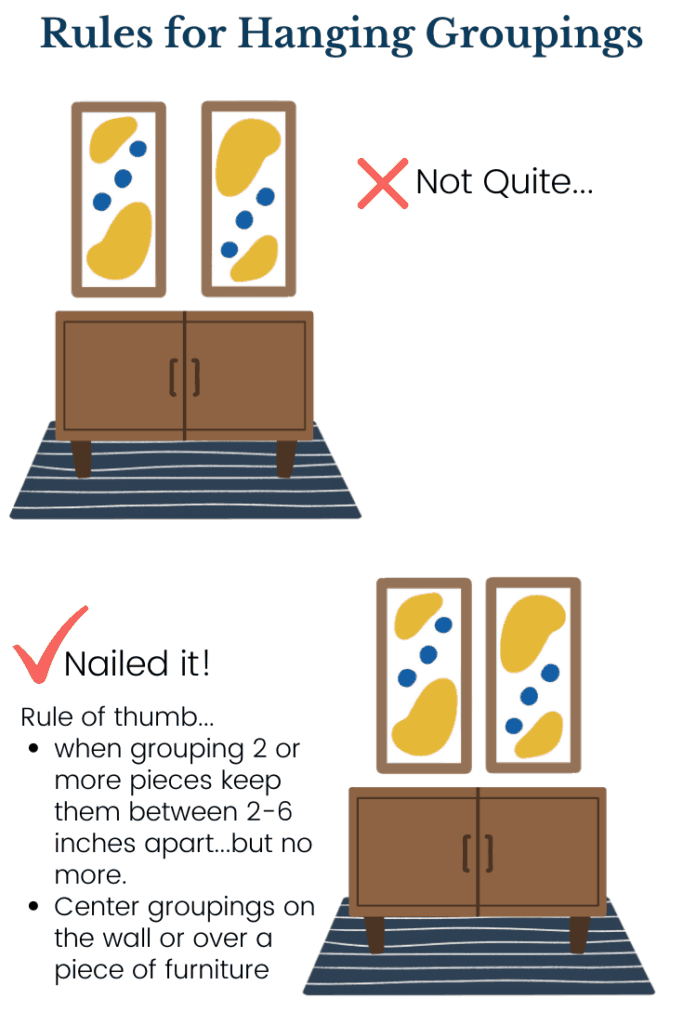
A few tips for groupings. Note this could be an entire post, so I’ll just touch on a few basics. Have the smaller pieces at the top and heavier pieces at the bottom. If it’s a grouping of 4 or more, then you can balance the grouping with the heavier pieces diagonally opposite. You may want to do a grid where all pieces are the same size and spaced equidistant from each other e.g. 2 inches all the way around each picture. Alternatively, you may want to do something where you have two pieces of art stacked on one side and a vertical frame on the other side. If you’re going with a more abstract grouping, then consider having between 3-6 inches between each picture.
With groupings, you should start from the center and work your way out. Measure how tall and wide the entire grouping is, then use one of the three rules for hanging mentioned earlier. Have the center of the grouping hit:
- Eyelevel (57-60 inches)
- The bottom of the grouping 6-8 inches above the furniture
- The grouping spaced equidistant in the allotted space
It’s time to Nail it!
Hanging artwork is simple and straight forward, you need to know a few guidelines to make it look just right! The eye level rule is helpful when determining height. Alternatively, you can make sure there are 6-8 inches above furniture. If you’re hanging multiple pictures in the same area, give 2-6 inches between frames.
It’s tempting to eyeball where you’ll hang artwork in your home, but this route typically leads to multiple holes in the wall and off-centered pictures. Measure, Mark, and Hammer and you’ll have a picture that is perfectly placed!


