Inside: From cluttered mess to organized bliss! If you’re tired of lost items and wasted space, this post is for you. Learn the exact steps to organize a deep pantry and reclaim order in your kitchen.
It’s the end of the day and time to cook dinner. Looking at your cluttered pantry takes away any energy you had left. You just don’t have it in you to hunt for things again. Ahh, you’ll make pasta tonight…something quick and easy and only requires a few ingredients. As you go to collect them, you realize the box of pasta you grab is at least 4 years old. And how Is it possible that you just bought more tomato sauce and tomato paste when you already had 6 cans of each in your pantry?
A cluttered pantry not only zaps your energy, but you’ll waste time searching for things and waste money buying items you already have.
I find that deep pantries are even more likely to hide things way in the back. Before you know it, you have a graveyard of very expired items.
In this post, I’ll share practical tips for deep pantry organization. I’ll take you through the exact steps to conquer clutter and reclaim order.
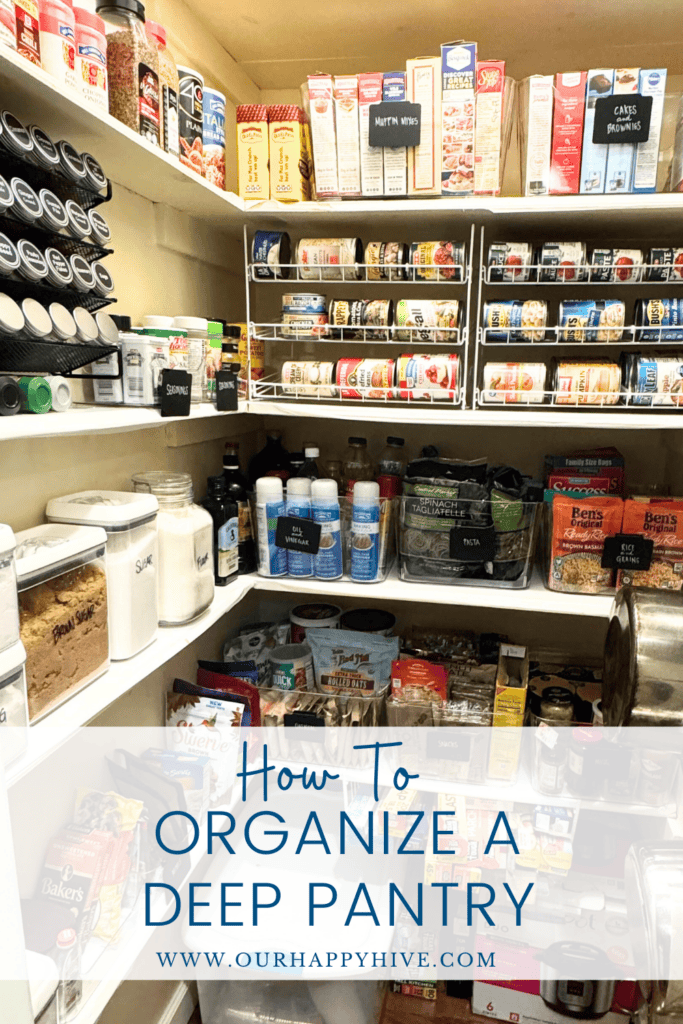
Four Steps To Declutter & Organize Your Deep Pantry
Step 1. Discard & Sanitize
Before you organize the pantry, it’s important to declutter. This is an important step in any home organization project. Check out this post for more info on why you should declutter first.
The good news is, it’s very easy to make decisions on what to discard. The rules are clear…anything that is expired should be discarded. I also encourage you to get rid of food items that you have too much of and aren’t likely to use e.g. the items you bought for that fad diet you were going to do last Spring.
Identify the Graveyard Zones as you Organize Your Deep Pantry
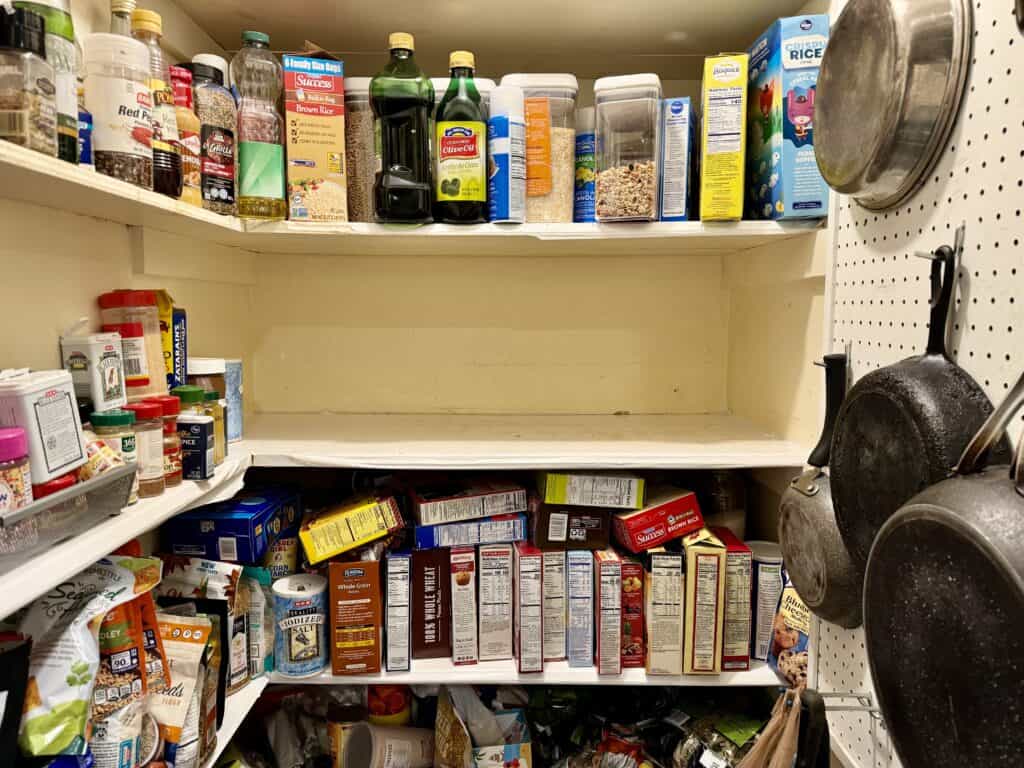
As you discard items, your graveyard zones will become apparent. Graveyard zones are where pantry items go to die. If you find one shelf or a particular area of a shelf i.e. the back of the top shelf, has things that are from 2016 -2018…then this is a graveyard zone!
Make note of these spaces. Later, you’ll want to implement solutions that’ll allow you to optimize these spaces. We’ll look at this more in Steps 3 and 4.
Make it a Tiny Task
If decluttering the entire pantry all at once feels like a daunting task, then make it a tiny task by taking it one shelf at a time. Declutter one shelf in the morning, come back and do a second shelf later in the day. Work at it as you have energy. The beauty of this approach is that you’ll gain motivation and momentum as you make progress in your space. Check out more about Tiny Tasks here.
Step 2: Sort & Categorize
After you discard the expired foods, it’s time to sort and categorize the remaining pantry items. You can now get a sense of how much stuff you truly have.
In my client’s deep pantry, we had over 2 bags of expired items. She was shocked, but the back of the top shelf and majority of the bottom shelf were true graveyard zones. The majority of these shelves had things that were never touched. I found graham cracker pie crusts from 2016, 2017, and 2018!
Once we could see how much stuff we really had, we could group the rest of the items in categories. The categories will change based on your personal preferences and the type of food your family eats. We used the following categories in my client’s pantry.
- Spices
- Canned goods
- Rice and grains
- Pasta
- Oil and vinegar
- Cakes and Brownies
- Muffins and Mixes
- Oatmeal
Step 3: Measure & Visualize
This step involves planning and optimizing your space. Here are four rules to help you plan your space.
- Maximize vertical space
- Plan around dead zones [graveyards]
- Ensure easy access to frequently used items
- Utilize effective storage solutions including shelves, racks, and bins.
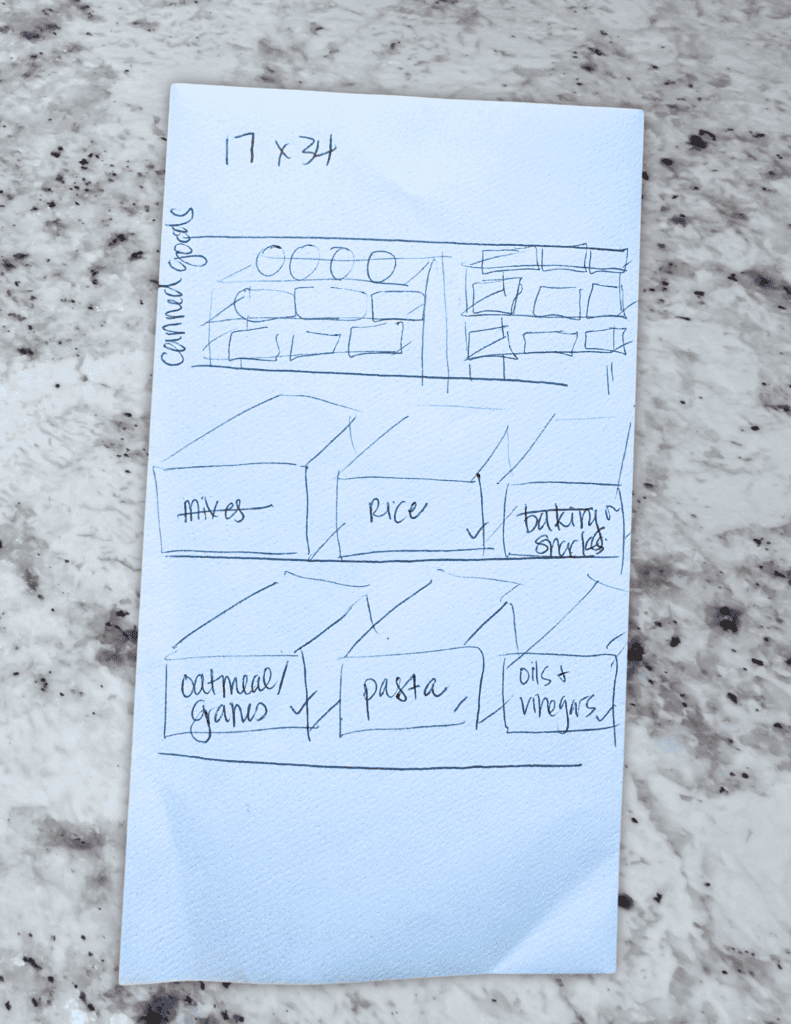
Before you buy any storage solutions, measure each shelf and plan your space. I like to draw the space out in advance to visualize what it will look like.
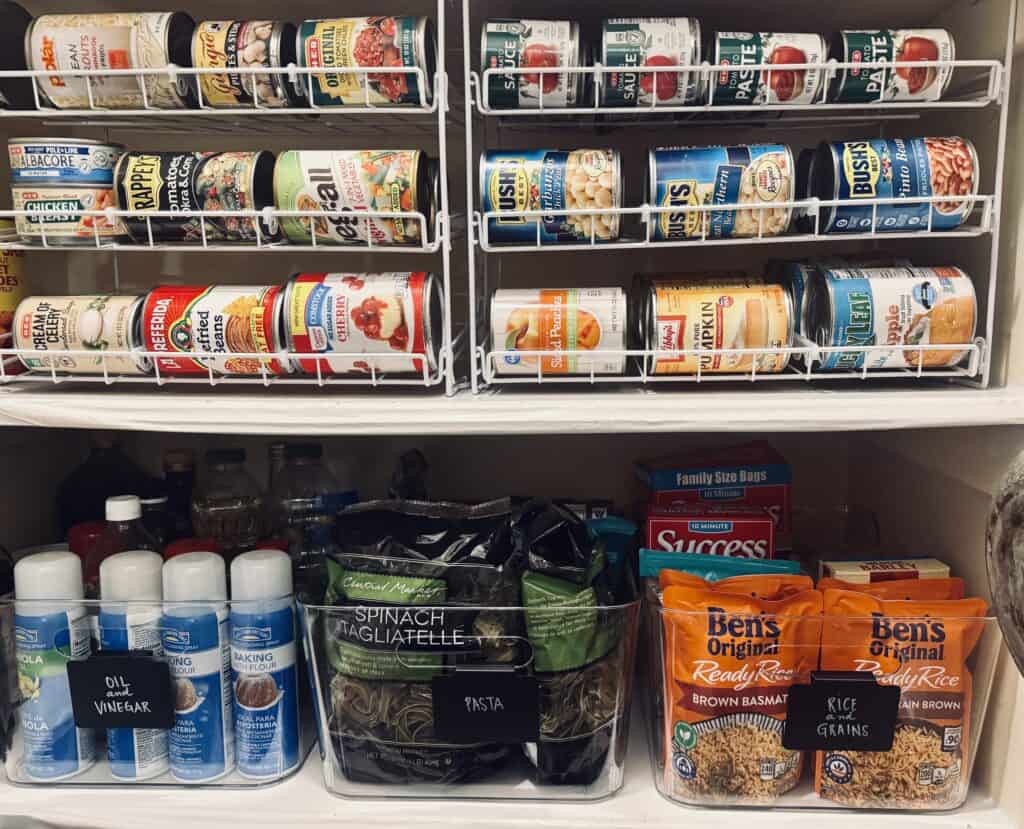
My favorite storage solution is plastic bins. I love these because they are easy to wipe down when it’s time to maintain your organized deep pantry. They also can contain a large volume of food. They are easy to label. And last but not least, bins are great in deep pantries, because you can slide them forward to see what’s in the back of the bin- instead of it getting lost in the back of the pantry.
My client had tons of spice bottles…often 2-3 of the same spice. This happened because she couldn’t see what she had. In order to make her deep pantry functional, a spice solution was necessary. She had a shelf on the side of her pantry that was very narrow…only 5 inches deep. It was ideal for spices. But, we needed to go vertical in order to optimize the space in the pantry. We purchased a spice rack that we could screw to the wall so that it didn’t fall over. The fresh new bottles allowed me to combine multiple partial bottles of the same spice. Then we created an area for back stock- the extra spices she had afterwards.
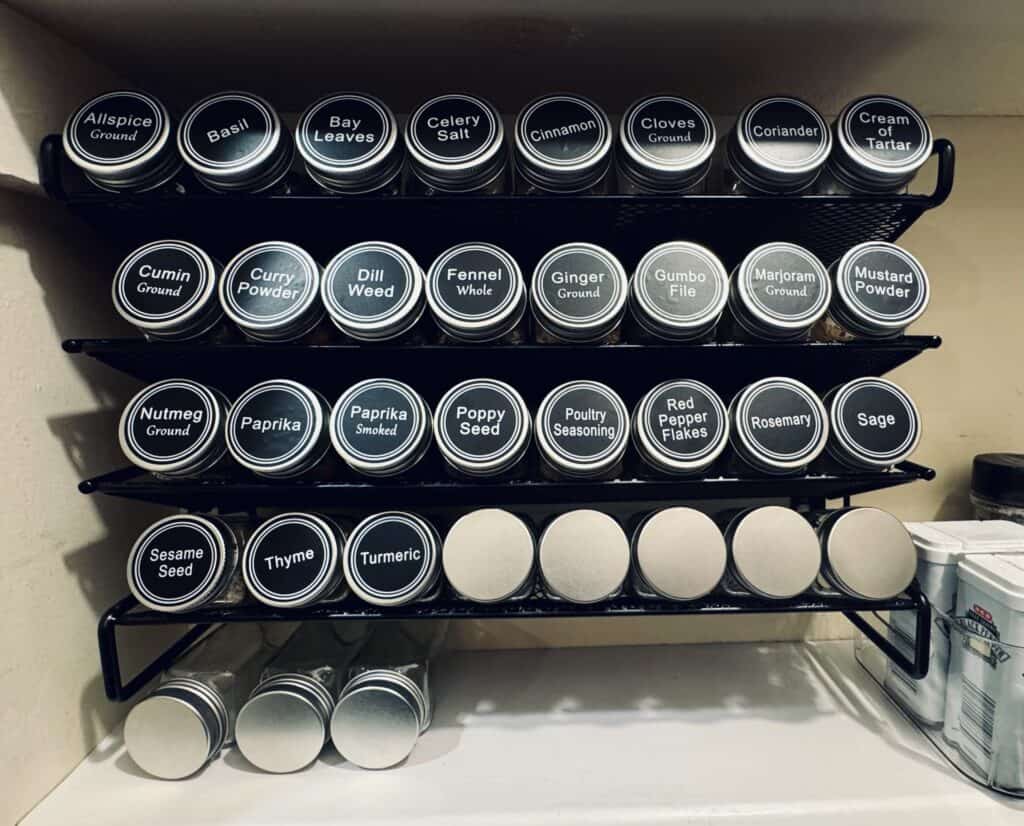
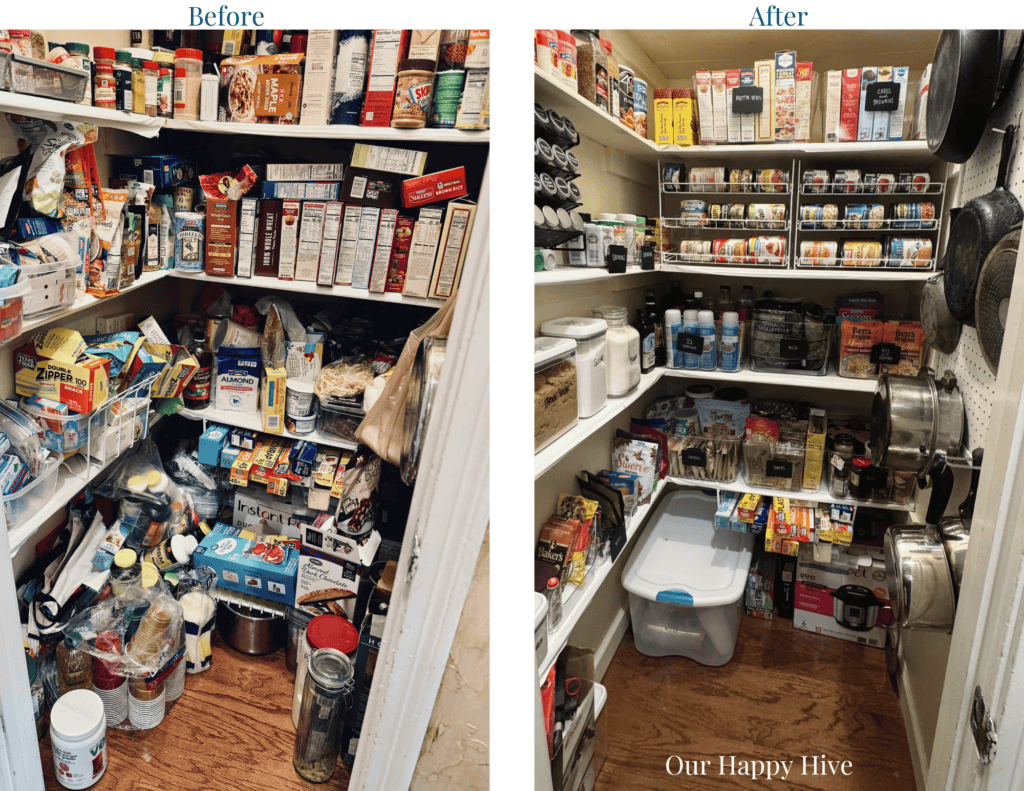
In order to avoid the graveyard zones, we used bins that could easily slide out. I also encouraged her to keep things on the front of the shelf specifically for the shelves that are not visible i.e. top and bottom shelves. While this might seem like a waste of space, the reality is that it wasn’t storing anything valuable to begin with.
Step 4: Store & Organize
Finally, it’s time to store and organize your items. The bins make this process super easy. Take one bin at a time and organize. Make sure to label each bin. This allows you and your family to find things and return them to the right space.
Place things in the space according to how you use them. The most frequently used items should be at eye level. Heavy items should be towards the bottom of the pantry. Less frequently used items that are not too heavy should be stored at the top of the pantry.
Maintenance
Once you have a system in place, it’s much easier to keep your pantry organized. Every six months or so, you can tidy the space. Just pull out one bin at a time and remove anything that has expired, wipe it down, and return the remainder.
Conclusion
In conclusion, transforming your deep pantry from chaos to order involves four key steps. Firstly, discard expired items and sanitize surfaces to create a clean slate. Next, sort and categorize the remaining items based on the frequency of use and type. Then, measure your pantry space and visualize how you want it to function, considering accessibility and convenience. Finally, implement storage solutions and organization systems tailored to your needs, maximizing space and ensuring items are easily accessible.
By following these steps, you’ll not only conquer clutter but also create a pantry that improves efficiency, reduces food waste, and inspires culinary creativity. With these simple steps, your deep pantry can become a well-ordered haven where meal preparation becomes a joy rather than a chore.


